Wednesday 30 March 2016

New Work- Fair Isle Brooches

March has been a strange month as Mr Writer was away for most of it- he worked in Korea for 4.5 weeks and this was the longest we have been apart in the 13 years we have been together. It really was so strange to be so far apart! Whilst my family and friends were so great at keeping me busy and distracted (thank you to you all!) I lost a lot of motivation and positivity and sadly didn't achieve as much as I would have liked to. I was so surprised at myself, I thought I'd achieve so much with all of that time on my hands, but I really underestimated how much Mr Writer motivates and encourages me. Thankfully he's back now and is having a good rest and I'm once again making and loving my work. I've got a week off from the day job and I'm looking forward to making a start on some new things and planning new content for the blog. Watch this space!

Today I thought I'd share some things I've finished so far this week...

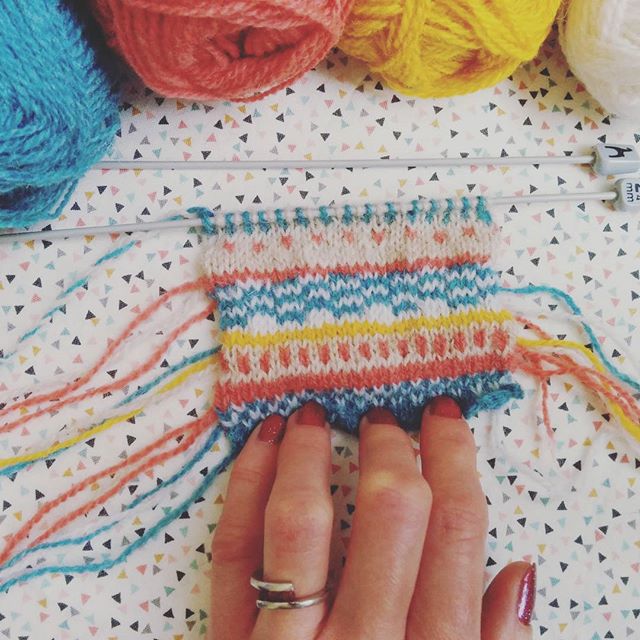
I'm really enjoying making these hand knitted Fair Isle brooches, designing the Fair Isle patterns and hand knitting them using Shetland wool. I'm learning more about Fair Isle with every one I make- I'm seeing this as an evolving project and a learning process


I'm hoping to take these particular brooches to show a potential new stockist of my work- fingers crossed!


When I first started making Fair Isle brooches I made them rectangular, but as I'm finding that these new square shaped brooches are getting a really good reaction, I'm going to go ahead now and always make them square, unless requested


Although I plan the patterns on knitter's graph paper, sometimes the design doesn't really pop until you knit it up. I had previously knitted this design in other colours and I thought I'd try it using different colours- it's one of my favourites. I don't intentionally try to make the patterns look like anything, re. flowers etc, as I like to design in a more spontaneous way, but I think this one looks like little houses!

Thank you for letting me share an insight into life lately- I'll be back later in the week to share my Instagram photos from March and also sharing a sneak peek at what I'm up to on my week off. I've also got a floral Spring themed How To in the planning!

Hope you've had a lovely March and wishing you a happy week!

Saturday 26 March 2016

Easter Bunny Sweetie Jar How To

Sharing a quick idea today- If you're looking for a last minute Easter gift idea there's still time to make this Easter Bunny sweetie jar! All you need is a clean empty glass jar with lid, a model rabbit (or lamb, chick or anything else with a spring theme), spray paint and a glue gun or other strong glue. Simply spray paint the jar lid and model rabbit, allow to dry and then glue the bunny to the lid. Fill with chocolate eggs or sweets of your choice and give as a gift or use as a quirky Easter decoration! 

You could even top the jar with those fluffy Easter Chick decorations, felt flowers or pom poms- lots of possibilities.

Happy making and have a lovely weekend, whatever you're up to!


Wednesday 9 March 2016

Spring Knitting and Stitching Show London 2016

Last Friday my friend Karen and I spent the day at the Spring Knitting and Stitching Show at Olympia, London. With Mr Writer working away in Korea my friends have been fab at keeping me busy and taking my mind off it. It was such a lovely day of distraction, packed full of stalls of knitting and sewing supplies, plus exhibitions and workshops- pretty much craft heaven! 

The stand I was most looking forward to visiting was Toft- how cute are these crocheted birds from the Edwards Menagerie Birds book?! Fab stand and beautiful yarn. I bought a beautiful pom pom- I've got a project in mind for this so I will share this at a later date!


Yarn lollipops!


Such a lovely, quirky vintage stand from the lovely Daisy from Make Thrift London


The bright, contemporary tapestry kits from Hannah Bass have definitely made me want to try this craft and I have one of her London kits on my crafty wishlist!


The Sincerely Louise stand was really busy with people snapping up her faux taxidermy kits. Just love these!


This pic really doesn't do justice to the amazing designs on the Hobbywool stand- I treated myself to one of their beautiful Latvian gloves kits- I'll share this at a later date. They are knitted on 1.5mm needles!


There were crafts to suit most interests- these contemporary cross stitch kits from StitchKits  were lovely- I especially love the London inspired designs- another one for my crafty wish list!


The Knitted Feast Competition was a fun idea! My favourite pieces were the plates of knitted seafood


We also took part in rag rug workshop run by Jenni Stuart-Anderson, learning the techniques of hooking and progging within the one hour session, creating a rag rug flower on a hessian bag. It was great to have a taster of these techniques and I can see that rag rugging could become addictive- it was a very therapeutic hour!

The choice of workshops was extensive and varied across the four day show, making this the ideal event for learning new skills


I'll share my buys from the show in another post soon. Did you visit the show?

Sunday 6 March 2016

Fair Isle Design Process WIP

I've recently bought some new colours in beautiful Jamieson and Smith Shetland wool (to add to my growing collection) and got to thinking that there must be a better way to organise the colours to help me when I'm coming up with new Fair Isle jewellery designs. So, inspired by the fab Attic24, I bought myself some Dolly Pegs (took me right back to childhood!) and spent a therapeutic afternoon watching Netflix and winding yarn onto the pegs to act as my "shade card"!


I'm finding it much easier to plan colour stories, working out what colours go well together and in which order with the yarn on the pegs than it was to place the whole balls of wool next to each other


These are the lovely new colours I've just chosen- really Spring like! I'm starting to go through the Jamieson and Smith shade card to label the pegs with their relevant shade number, to make it easier when I come to order more yarn


I'm having a lot of fun playing with different colour combinations and looking forward to knitting them into new Fair Isle jewellery pieces


I think this idea works really well in terms of making custom pieces too, because the customer can come up with their own colour scheme from this selection


If you're a regular reader you will know that I have been planning my Fair Isle designs using knitter's graph paper, but for the latest few pieces I have just picked up the yarn and needles and worked in a free form whatever comes out of my head type of way, to try a less regimented way of working and just have fun with the colours. I tried to felt this particular piece but sadly it didn't work


I've decided not to make the rectangular Shetland wool brooches any more and instead I'm focusing on square Fair Isle brooches, as I think you can fit more pattern onto the square shape


With such a large range of colours there is a lot of scope for many and varied designs. I love this really girly colour scheme, which again I knitted in a "free form" style.

I'll be sure to share my new designs with you as I continue to have fun playing with the colours!

Thursday 3 March 2016

How To... Handmade Patchwork Mother's Day Card

It's Mother's Day this Sunday 6th March! I always like to make my Mum a handmade card- I love making cards and I think it's so lovely to receive them- I always keep them when I receive one. This Patchwork handmade Mother's Day card idea is a great way to use pretty fabrics from your stash (if you're a regular reader you will know that I love a stash busting How To!) and could even be mounted in a frame after Mother's Day. Here's how to make it!


1) You will need

Blank greetings card, pretty fabric scraps, small piece of paper for making heart template, ruler and pencil, pins, fabric scissors, embroidery thread, small piece of cotton fabric for use as backing, small piece of Bondaweb, double sided tape


2) Cut the piece of cotton fabric to the size you would like for the background

3) Cut strips of fabric the length of the background fabric and to a width of your choosing. I was aiming for a random patchwork effect so the pieces are of different widths and are not cut perfectly straight


4) Heat your iron and cut the piece of Bondaweb to the same size as the backing fabric. The Bondaweb will have a paper on one side and a side that feels rough- this is the glue. Apply the rough side of the Bondaweb face down onto the backing fabric, so the paper side is facing you. Cover with a piece of baking parchment or a thin piece of fabric to protect your iron and iron for 10-20 seconds. If you iron it for too long it will be impossible to peel the paper off (I've learnt the hard way!). Peel off the paper- do this while the Bondaweb is still hot, or the paper may be difficult to remove

5) Decide how you would like you fabric strips to be arranged and place them onto the prepared backing fabric, overlapping them slightly. Cover with a piece of baking parchment or thin fabric and iron for 10-15 seconds to fix the fabric to the background- the fabric strips should now be attached to the backing fabric. Trim the edges of the fabric if necessary


6) Draw a heart shape onto thin paper or card and use this template to cut the fabric heart


7) Pin and then stitch the heart patch to the middle of the background patch. I've simply over sewn the heart but check out more stitch inspiration here. Next, stitch around the edge of the patch to seal the edges- again, I've over sewn the edges but you could use blanket stitch or add a decorative embroidered border


8) Write "mum" in the middle of the heart lightly in pencil, or use a heat dispersing pen and embroider over the top using running stitch


9) Attach the patchwork to the blank card using double sided tape. After Mother's Day the patch could be mounted onto strong card and displayed in a box frame- it's both a card and a gift!


Happy making!